
Configure Suralink SSO with Azure AD
Single Sign-on (SSO) is a fantastic idea for Suralink. The below guide will assist with SSO setup for Suralink with Azure Active Directory.
Before we begin: The Azure environment updates frequently. The screenshots and information is up-to-date as of January 2022.
Licensing Requirements
At the time of this writing, single Sign-On is a Premium/Enterprise feature.
Unfortunately, this means that you will need to upgrade your licenses if you are on the Standard plan.
Before you begin
To perform the operations below, you must be an Azure Application Administrator or Global Administrator. In the Suralink platform, you must be an Administrator.
Finally, team profiles (aka Employees) in the Suralink system must have emails that match their Azure AD Profile email.
Info: If you find incorrect emails in Suralink, you will have to reach out to Suralink support to get them updated.
Setup an Azure Enterprise Application and Configure SSO in Suralink
- Login to the Azure Active Directory Portal.
- Go to Enterprise applications > New Application
- Choose ‘+ Create your own application’
- Add a name for your application. I entered “Suralink.” Keep the radio box “Integrate any other application you don’t find in the gallery (Non-gallery). Select Create.
Keep this web page open for use in later steps.
- Login to your Suralink site as an Administrator.
- Go to ‘My Firm’ > Security tab
- In the Single Sign On (SSO) grouping, choose the option Enable Single Sign On.
Keep this web page open to use in the subsequent steps.
Info: At the time of this writing, their is a FAQ sheet available for download in this section of the website by clicking the ‘Suralink_SSO.pdf’ URL.
- Go back to the Enterprise Application you created (the webpage you left open in step 4). Choose ‘Single sign-on’
- Select ‘SAML’
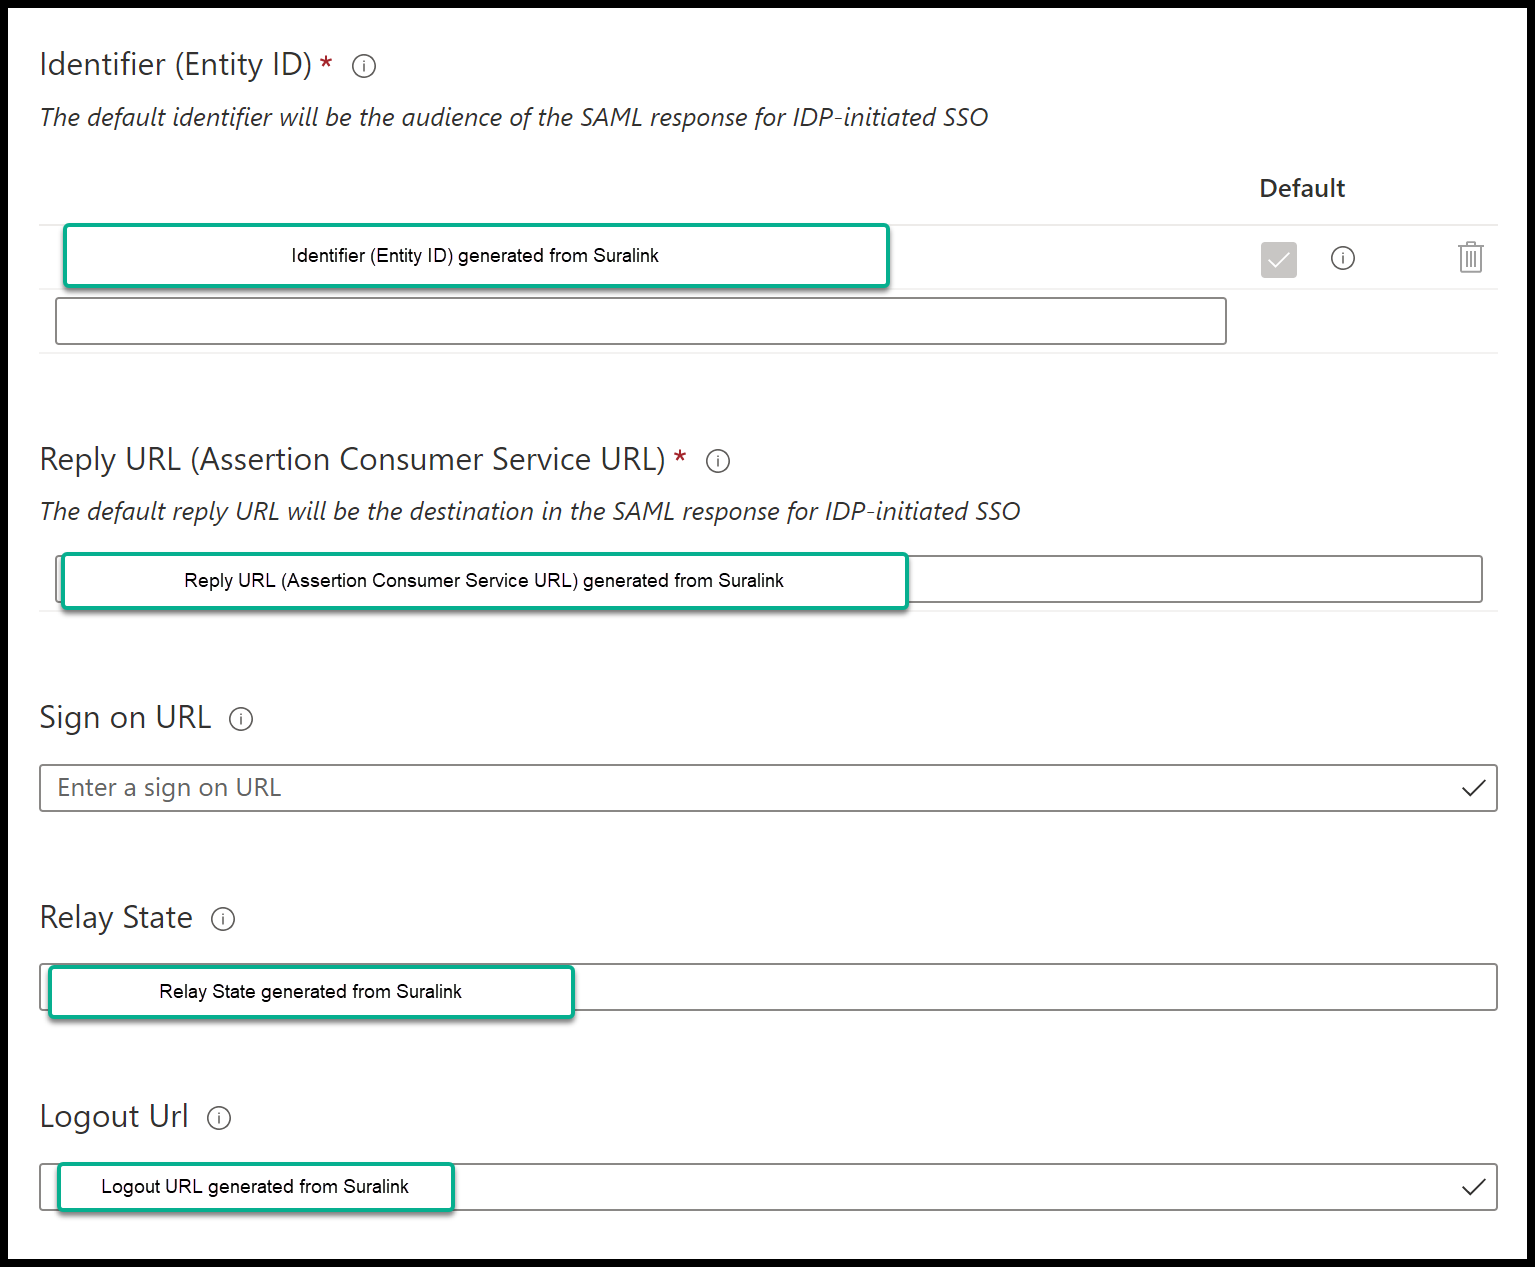
- In the section 1, “Basic SAML Configuration” click the pencil icon.
- Enter the generated values from Suralink (generated in step 7) to your Azure App.
The following fields will be put in section 1:- Identifier (Entity ID)
- Reply URL (Assertion Consumer Service URL)
- Relay State
- Logout URL
It will look like the following:
After you hit save, it will look like the following:

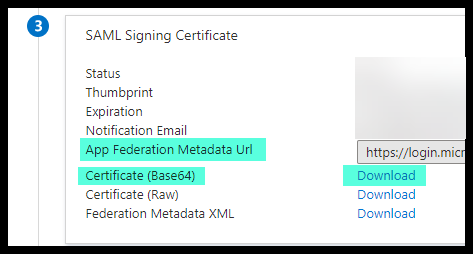
- Still in the Azure SAML configuration, go to section 3. Copy, download, and retain
the following items:
- Federation Metadata XML URL
- The Certificate (Base64)
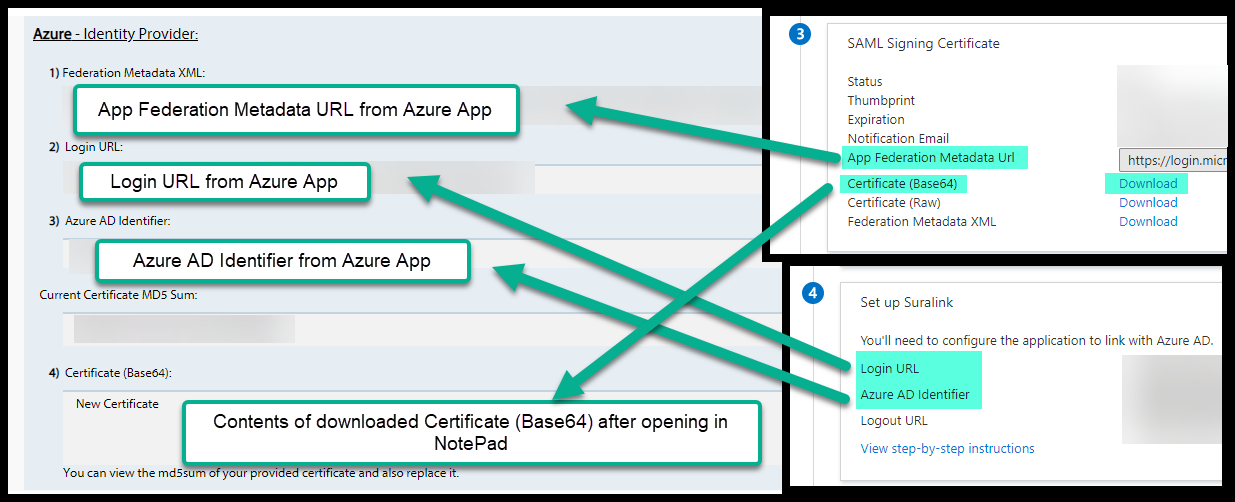
- Next, in the Azure SAML configuration section 4, copy and retain the following URLS:
- Login URL
- Azure AD Identifier

- Now, go back to the Suralink Admin page and paste the values you captured in steps 12 and 13 into the appropriate boxes. For the certificate, open this in Notepad and copy the physical text.
- In the Suralink app, assign the identities you want to allow SSO by going to Users and Groups > adding the identities OR allowing everyone to authenticate by going to the Properities of the app > toggle ‘Assignment Required’ to ‘No’
- That’s it! You are ready to test!
Warning: If you have Multi-Factor enabled in Suralink, disable this value by going to Suralink > My Firm > Security (tab) > Required Two-Factor Authentication section, select ‘Disable Forced Two-Factor Authentication.’ This will allow you to configure MFA on the Azure Identity Provider and prevent confusion on which MFA Provider they are using.
Employee Experience - Testing your SSO
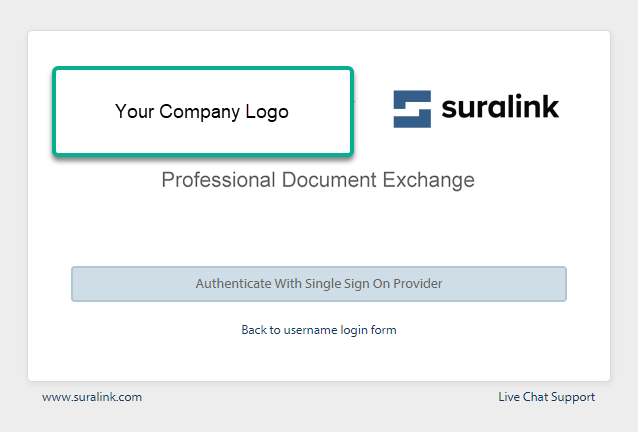
When you go to your Suralink site (https://contoso.suralink.com), it will update the login window. Employees will now choose ‘Authenticate With Single Sign On Provider’. From here, they will be redirected to use their Azure credentials.
Client Experience
Clients should go to https://app.suralink.com. If staff members have been providing the company URL, https://contoso.suralink.com, then the client will have to choose the link ‘Back to username login form’ to authenticate. With that said, if the client should go back to https://contoso.suralink.com they will not have to click the link again. That is, as long as they do not clear their browsers cache/cookies.
Final closing comments
The Azure Identity Provider has a ton of features! Please do the bare minimum of enabling Multi-Factor Authentication via conditional access policies or tenant security defaults. While it is out of the scope of this post to cover the massive security features in Azure, I do strongly encourage you to research and implement them as soon as possible due to the high level of cybercrime over the last few years.
Anyways, I’m off to setup an Azure AD Application Proxy to publish our Internal applications to be accessible from anywhere. I hope this post was helpful. If not, Suralink support (at the time of this writing) is stellar!
Peace,
Jeremiah
Leave a comment